
Are you looking to expand your collection of beautiful houseplants without spending extra money? Perhaps you have a thriving snake plant and dream of sharing its striking beauty with friends, or maybe you just want more of these easy-care greens for your own home. Learning how to propagate snake plant is a truly satisfying way to grow your indoor garden, and it's actually much simpler than you might imagine. This guide will walk you through the process, making it easy to create new plant babies from your existing, well-loved snake plant.
Propagating a snake plant, which some folks call Sansevieria, means you are making new plants from a parent plant, as a matter of fact. It’s a process where you cause a plant to continue or increase its numbers through natural reproduction. This could be by taking a piece of the parent plant and helping it grow roots, or by dividing an existing plant. It’s pretty cool, you know, to see a tiny piece of green turn into a whole new plant.
This particular plant is known for being incredibly tough and quite unique looking, making it a favorite for many plant lovers. You can easily grow more of them, which is, honestly, one of the best parts about having houseplants. So, if you're ready to get your hands a little dirty and multiply your green friends, let's get into the details of how to propagate snake plant using different easy methods.
Table of Contents
- What Exactly is Plant Propagation?
- Why Propagate Snake Plants?
- When is the Best Time to Propagate?
- Tools You'll Need
- Method 1: Water Propagation (Leaf Cuttings)
- Method 2: Soil Propagation (Leaf Cuttings)
- Method 3: Division Propagation (Rhizomes)
- Caring for Your New Snake Plant Babies
- Common Questions About Snake Plant Propagation
- Frequently Asked Questions (FAQs)
- Final Thoughts on Growing Your Collection
What Exactly is Plant Propagation?
Well, to be honest, the word "propagate" can sound a bit formal, but it just means helping a plant make more of itself. It's about causing an organism to multiply or breed, using parts of the parent stock. Think of it like a plant having babies, you know, without needing seeds sometimes. It's a way to cause a species of fruit tree, for instance, to continue or multiply by successive production, or to propagate a breed of horses or sheep, as it were.
In simple terms, for plants, it means taking a piece of an existing plant and encouraging it to grow into a whole new, independent plant. This can be done through sexual reproduction, like with seeds, or asexual reproduction, which is what we're talking about here with cuttings or division. It's a pretty neat trick that plants can do, and we just give them a little help.
Why Propagate Snake Plants?
There are, you know, quite a few good reasons to learn how to propagate snake plant. For one thing, it's incredibly rewarding to watch a small cutting develop roots and grow into a full-sized plant. It's a fun way to get new babies, as the text mentions, and really expand your plant family. Plus, snake plants are known for being super easy to grow, so they are a great starting point for anyone new to propagation.
Beyond the joy of growing, it's also a very practical way to get more plants without spending money. You can fill your home with more greenery, give unique gifts to friends, or even replace an older plant that might be getting a bit too big or leggy. It's a simple process that, honestly, adds a lot of value and enjoyment to being a plant parent.
When is the Best Time to Propagate?
The best time to propagate your snake plant is, generally, during its active growing season. This usually means spring or early summer. During these warmer months, the plant has more energy and resources to put into root development and new growth. The increased light and warmth really help the cuttings get a good start, so it's a good idea to aim for this period.
While you can, pretty much, try propagating at any time of year, doing it in the warmer months tends to give you the best success rates. The plant is just more inclined to be fruitful and multiply then. If you try it in the cooler months, it might just take a bit longer for those roots to show up, or the success rate could be a little lower, you know.
Tools You'll Need
Before you get started on how to propagate snake plant, you'll want to gather a few simple items. Having everything ready makes the process go smoothly, so you're not scrambling mid-way. You probably have most of these things around your house already, honestly.
- Sharp Knife or Scissors: Make sure they are clean! Sterilizing them with rubbing alcohol helps prevent any plant diseases.
- Potting Mix: For soil propagation, a well-draining mix, like a cactus or succulent blend, is perfect.
- Pots: Small pots with drainage holes for your new plant babies.
- Glass Jar or Vase: For water propagation. Clear glass lets you see the roots grow, which is pretty exciting.
- Rooting Hormone (Optional): This can speed up root development, but it's not strictly necessary for snake plants, which are pretty good at rooting on their own, as a matter of fact.
- Gloves: Snake plant sap can sometimes cause skin irritation for some people, so gloves are a good idea.
Method 1: Water Propagation (Leaf Cuttings)
Water propagation is, arguably, one very popular method for how to propagate snake plant, especially for beginners. It's exciting because you can actually see the roots forming, which is quite satisfying. This method uses leaf cuttings, so you'll be taking a piece of a healthy leaf from your parent plant.
Steps for Water Propagation:
- Select a Healthy Leaf: Choose a mature, firm leaf from your snake plant. You want one that looks vibrant and healthy, not soft or damaged. A good, strong leaf is, basically, going to give your new plant the best start.
- Make Your Cut: Using your clean, sharp knife or scissors, cut a section of the leaf. You can take a whole leaf from the base, or cut a long leaf into several smaller pieces, about 2-4 inches long. If you cut a long leaf into sections, make sure you remember which end is "down" – the end that was closer to the plant's roots. This is really important for successful rooting, you know.
- Notch the Bottom (Optional but Recommended): Some people like to cut a small "V" shape or a slight diagonal at the bottom of each leaf segment. This increases the surface area for rooting and can help prevent rot. It's just a little trick that might give you better results.
- Allow to Callus: This is a pretty crucial step. Lay your leaf cuttings in a dry spot for a few days, or even up to a week. The cut end needs to dry out and form a callus, which is like a protective scab. This helps prevent the cutting from rotting once it's placed in water, so don't skip this part.
- Place in Water: Once callused, place the bottom end of each leaf cutting into a glass jar or vase filled with clean water. Make sure only the bottom inch or so of the cutting is submerged. You don't want the whole leaf sitting in water, just the very bottom.
- Find a Good Spot: Put your jar in a spot with bright, indirect light. Avoid direct sunlight, which can cook your cutting. A windowsill that gets good light but isn't scorching hot is, honestly, a pretty good choice.
- Change the Water Regularly: Change the water every few days, or at least once a week. This keeps the water fresh and oxygenated, which is vital for root development and helps prevent bacterial growth. Clean water is, like, super important for this process.
- Wait for Roots: This is where patience comes in! It can take anywhere from a few weeks to a couple of months for roots to appear. You'll eventually see tiny white roots emerging from the bottom of the cutting. Once the roots are about an inch or two long, your new plant is ready to be moved to soil. Sometimes, you might even see a tiny new plantlet forming at the base of the cutting, which is, basically, a bonus!
Pros of Water Propagation:
- You See the Roots: It's incredibly satisfying to watch the roots grow, which can be a great motivator for beginners. You literally get to observe the process unfold, which is pretty neat.
- Less Risk of Rot (if done correctly): By changing the water regularly and allowing callusing, you can minimize the chances of the cutting rotting, though it's still a possibility, of course.
- Easy to Monitor: You can easily check the progress of your cuttings and see if anything looks off, like if the water is getting cloudy or the cutting is softening.
Cons of Water Propagation:
- Slower to Root: Water propagation can sometimes take longer than soil propagation for roots to form. It's not an instant thing, so you need to be patient.
- Transition Shock: Cuttings rooted in water can sometimes experience a bit of shock when moved to soil, as they are used to a different environment. This might mean a brief period of slow growth after transplanting.
- Risk of Rot: If the water isn't changed regularly, or if the cutting wasn't properly callused, it can still rot. So, you know, attention to detail helps.
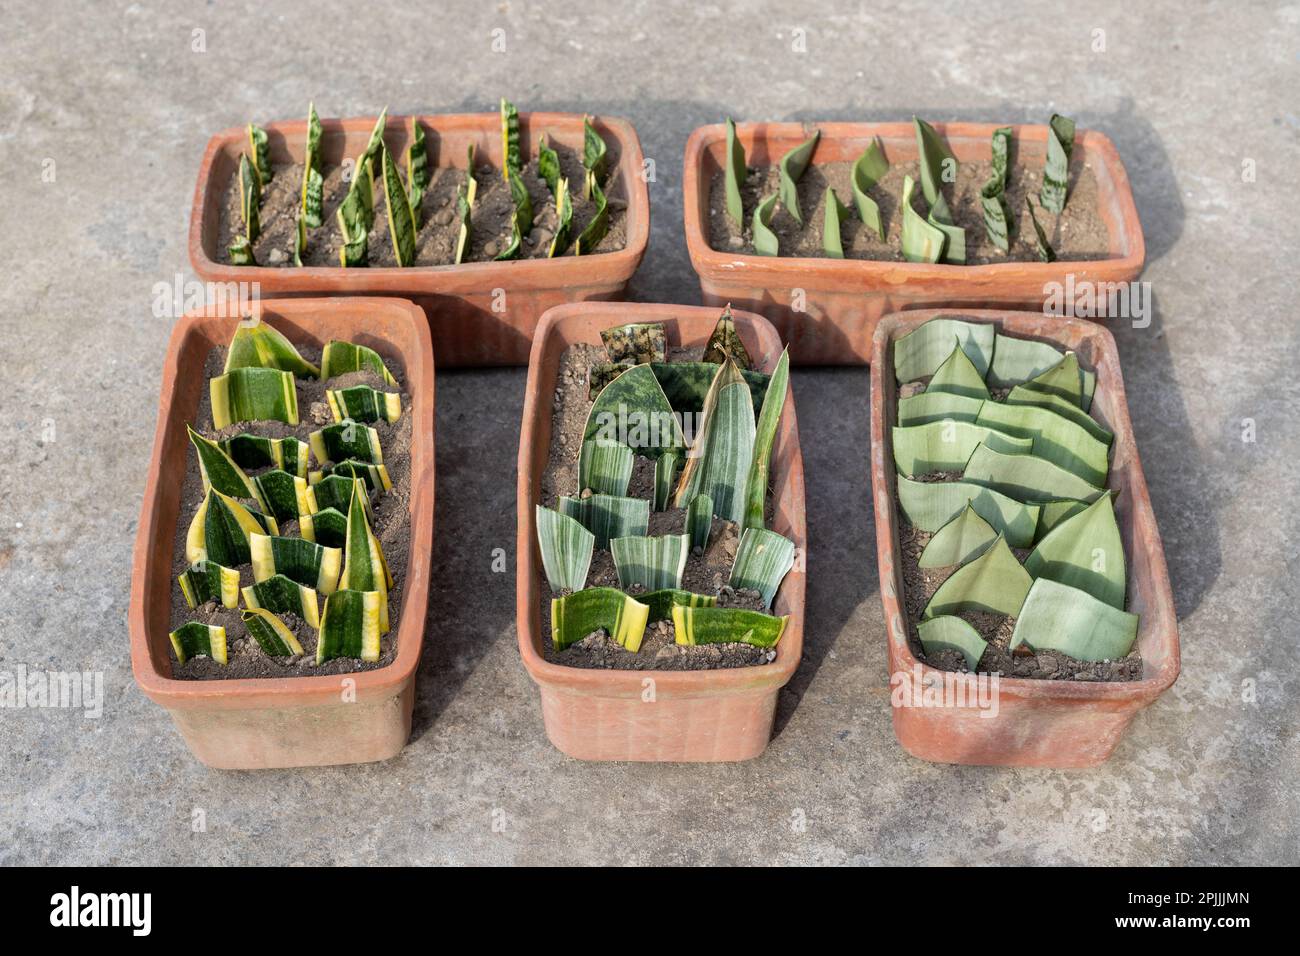
Method 2: Soil Propagation (Leaf Cuttings)
Soil propagation is another fantastic way for how to propagate snake plant using leaf cuttings. This method often results in a plant that is already accustomed to growing in soil, which can sometimes make the transition smoother. It's a bit more "set it and forget it" than water propagation, in some respects, once the initial setup is done.
Steps for Soil Propagation:
- Prepare Your Cuttings: Just like with water propagation, select a healthy, mature leaf. Cut it into 2-4 inch segments, making sure to remember which end is the bottom. A diagonal cut at the bottom can also be helpful here, just to increase the rooting surface.
- Callus Your Cuttings: This step is, honestly, even more important for soil propagation. Lay your leaf segments out in a dry spot for at least 3-7 days until the cut ends are completely dry and callused. This barrier helps prevent fungal issues once the cutting is in moist soil.
- Prepare Your Potting Mix: Fill a small pot with a well-draining potting mix. A mix designed for cacti or succulents is ideal, as snake plants really don't like soggy feet. You want something that lets water pass through pretty easily.
- Plant the Cuttings: Insert the callused bottom end of each leaf cutting about 1 inch deep into the prepared soil. You can plant several cuttings in one pot, but make sure they have a little space between them. You can use a pencil or a stick to make a small hole first, then gently place the cutting in.
- Lightly Water: Give the soil a very light watering. You want it to be just barely moist, not soaking wet. Overwatering is, actually, the biggest enemy of snake plant cuttings in soil, as it can lead to rot very quickly.
- Find a Good Spot: Place the pot in a warm spot with bright, indirect light. Again, avoid direct, harsh sunlight. A consistent temperature is pretty helpful for rooting.
- Patience and Minimal Watering: This is the hardest part, you know. Resist the urge to water frequently. Only water when the soil is completely dry, which might be every 2-4 weeks, depending on your environment. Too much water will almost certainly cause rot. Roots can take anywhere from 1-3 months to form. You'll know it's rooted when you gently tug on the cutting and feel some resistance, or when you see new growth emerging from the soil.
Pros of Soil Propagation:
- Less Transition Shock: Cuttings rooted in soil are already used to their growing medium, so they typically experience less shock when they start growing as full plants. This can mean a more seamless transition.
- More Natural Environment: For many, this feels like a more natural way to root a plant, and it can be less hands-on once the initial planting is done.
- Potentially Stronger Roots: Some argue that roots formed in soil are generally stronger and more robust from the start, as they are already reaching for nutrients.
Cons of Soil Propagation:
- Hidden Progress: You can't see the roots forming, which can be a bit frustrating for those who like to monitor progress closely. It's a waiting game, honestly.
- Higher Risk of Rot: If you overwater, or if the cutting wasn't properly callused, rot is a very real concern in soil. It's harder to recover from rot in soil than in water, too.
- Slower Initial Growth: While the roots might be stronger, the visible growth of new plantlets can sometimes take a bit longer to appear compared to water-rooted cuttings, or so it seems.
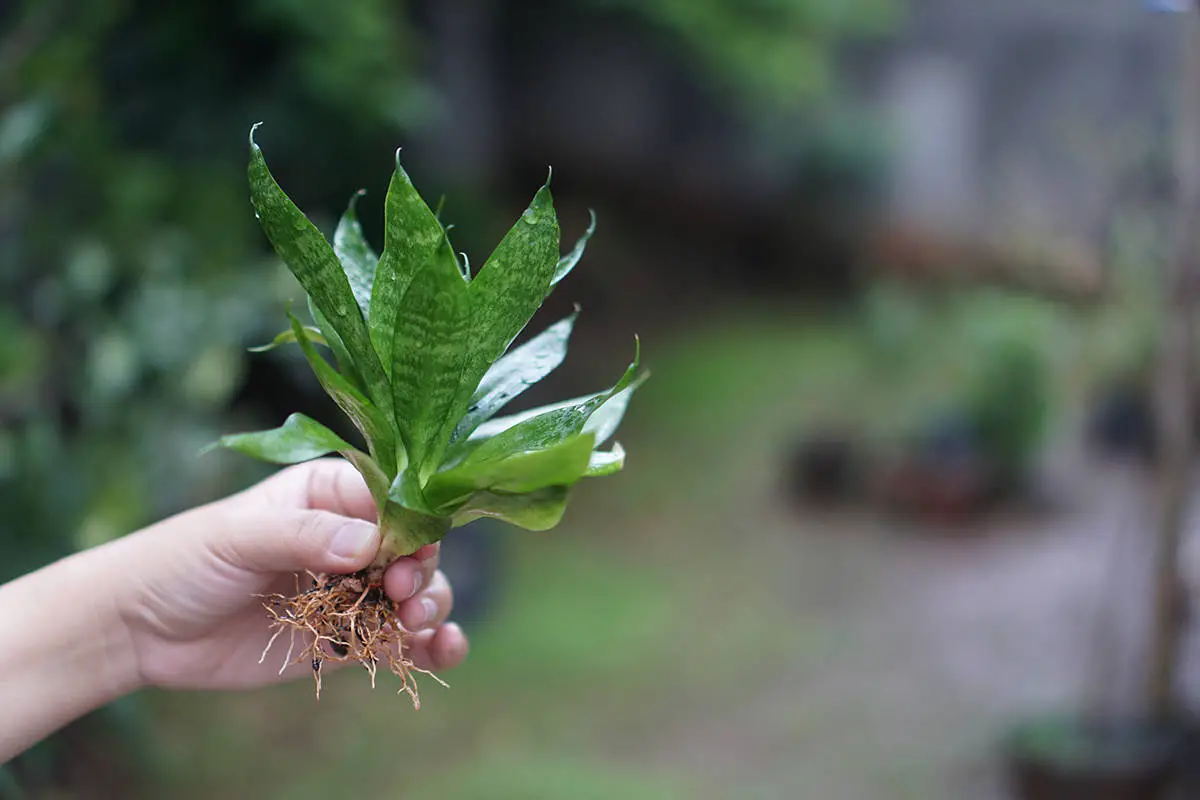
Method 3: Division Propagation (Rhizomes)
Division is, actually, the fastest and most reliable way for how to propagate snake plant, especially if your plant has gotten quite large and has multiple "pups" or shoots. This method involves splitting the entire plant at its root system, or rhizomes, into smaller, independent plants. It's a great way to rejuvenate an older plant that's become a bit too crowded in its pot, too.
Steps for Division Propagation:
- Remove the Plant from its Pot: Gently take the entire snake plant out of its pot. You might need to loosen the soil around the edges with a knife or carefully tip the pot on its side and slide the plant out. Be careful not to damage the leaves or roots too much.
- Inspect the Root Ball: Once out of the pot, gently shake off some of the excess soil so you can clearly see the root system and the rhizomes. These are the thick, fleshy underground stems that connect the different parts of the plant. You'll notice natural divisions where individual shoots are growing.
- Identify Division Points: Look for natural clumps or sections of the plant that have their own roots and at least one or two leaves. These are your potential new plants. You want to make sure each section you separate has a good root system attached, you know.
- Separate the Sections: Using your clean, sharp knife, carefully cut through the rhizomes to separate the chosen sections. If the plant is very root-bound, you might need to be a bit firm, but try to be as gentle as possible to minimize damage to the roots. You can also sometimes gently pull apart sections that are loosely connected.
- Repot New Plants: Immediately pot each new division into its own pot filled with fresh, well-draining potting mix. Make sure the pot size is appropriate for the size of the division – not too big, not too small.
- Water Lightly: After repotting, give each new plant a light watering. Just enough to settle the soil around the roots. Again, avoid overwatering.
- Place in a Good Spot: Put your newly divided plants in a spot with bright, indirect light. They might experience a little shock for a few days, but they should recover quickly and start putting out new growth. This method is, honestly, very effective for getting established new plants.
Pros of Division Propagation:
- Fastest Method: This is, basically, the quickest way to get a new, established snake plant. You're simply separating an existing plant into multiple ones.
- High Success Rate: Because each division already has roots and leaves, the success rate for this method is typically very high. It's a pretty reliable option.
- Immediate Plant: You get an instant new plant, rather than waiting for roots to form from a cutting.
Cons of Division Propagation:
- Requires a Mature Plant: You need a snake plant that is large enough and has multiple shoots to divide. You can't do this with a small, single-leaf plant.
- Messier: This method involves taking the plant out of its pot and dealing with soil and roots, which can be a bit messier than just taking a leaf cutting.
- Potential for Stress: While generally successful, the parent plant and the new divisions might experience a little stress from the disturbance, but they usually bounce back quickly, you know.
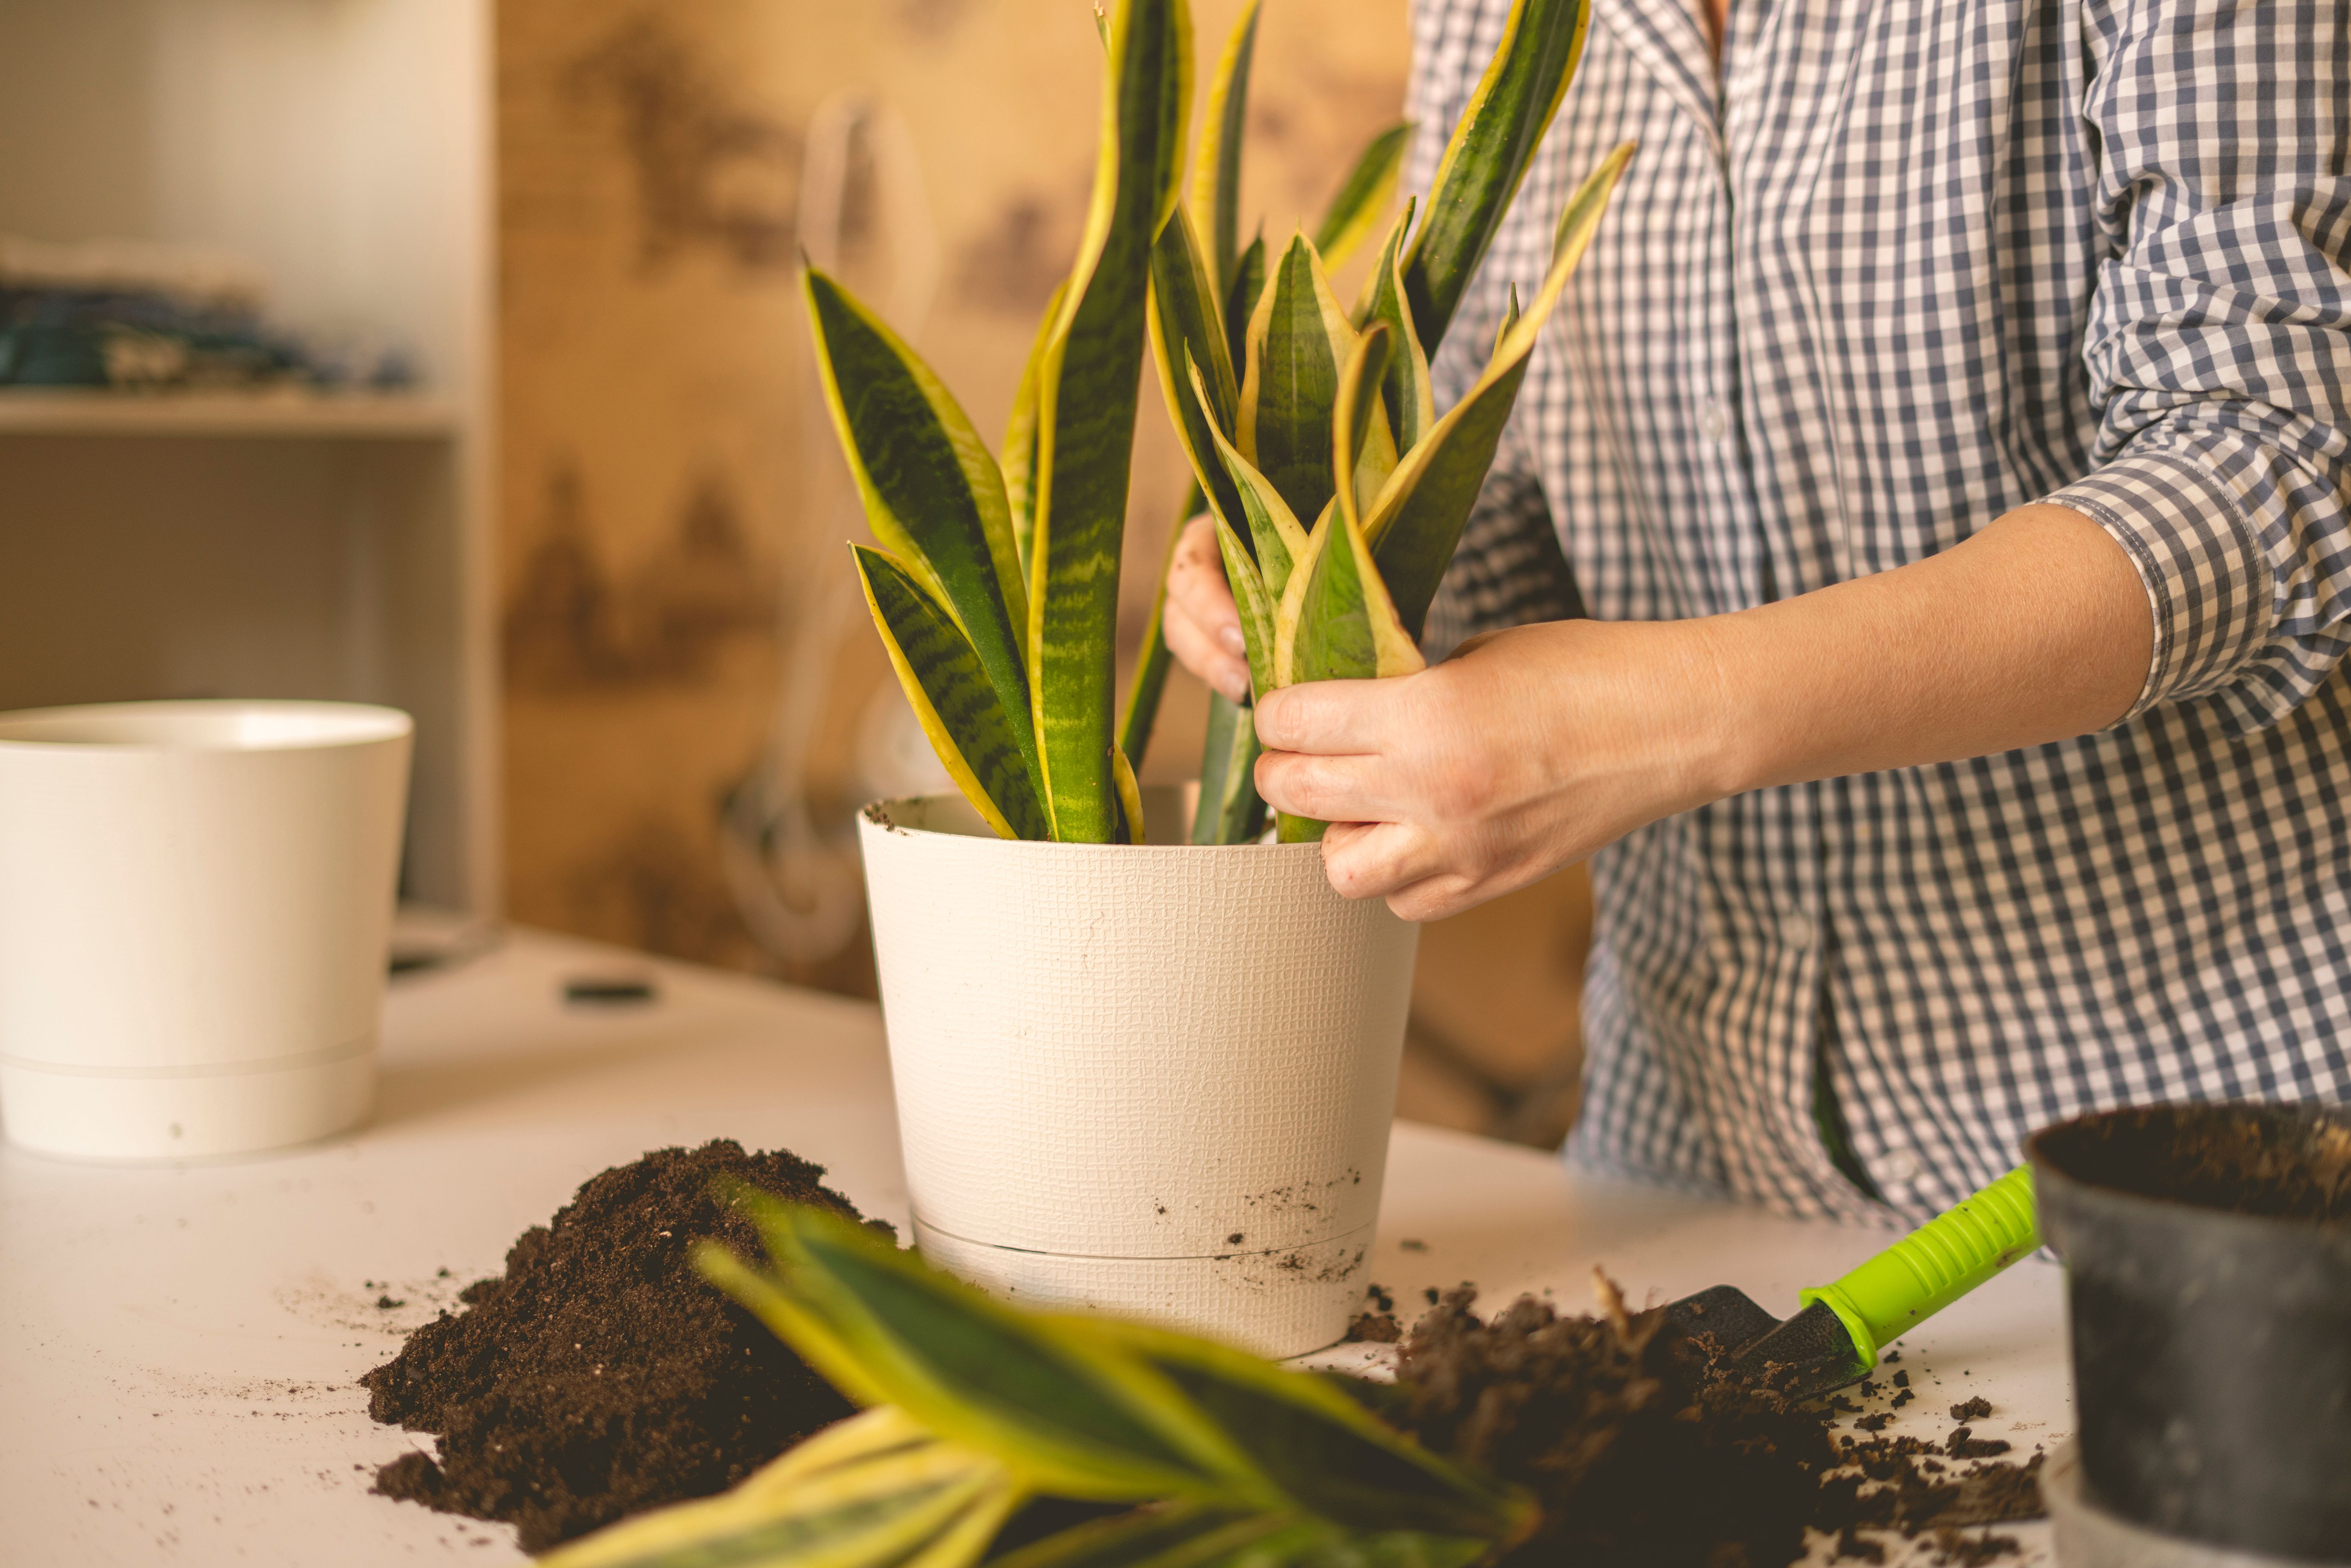
Caring for Your New Snake Plant Babies
Once you've successfully learned how to propagate snake plant and have your new plant babies, it's pretty important to give them the right care to help them thrive. They're still a bit fragile at this stage, so a little extra attention goes a long way. This will ensure they grow into strong, healthy plants, you know.
- Light: Provide bright, indirect light. Avoid intense, direct sunlight, especially for newly rooted cuttings, as their tender roots can be sensitive. A spot near a window but not directly in the sun's path is usually perfect.
- Watering: This is, arguably, the most important aspect of snake plant care, especially for new plants. Water sparingly! Snake plants are succulents and store water in their leaves, so they are very susceptible to root rot if overwatered. Let the soil dry out completely between waterings. When you do water, water thoroughly until it drains from the bottom, then let it dry out again. It's better to underwater than to overwater, honestly.
- Soil: Continue using a well-draining potting mix, like a cactus or succulent blend. Good drainage is key to preventing root rot.
- Humidity: Snake plants are not particularly fussy about humidity, so average household humidity levels are generally fine.
- Fertilizing: Avoid fertilizing newly propagated plants for the first few months. They need time to establish their root system. Once they show signs of active growth, you can fertilize lightly during the growing season (spring and summer) with a balanced liquid fertilizer diluted to half strength.
- Patience: Remember that growth can be slow, especially for leaf cuttings. Don't get discouraged if you don't see rapid growth right away. Snake plants are known for their slow and steady progress, so just keep caring for them consistently.
Common Questions About Snake Plant Propagation
People often have questions when they're learning how to propagate snake plant, which is totally normal. It's a new skill, after all! Here are a few things that often come up, just so you're prepared for what might happen.
- Why isn't my cutting rooting? Sometimes, it just takes time. Make sure you've provided the right conditions: bright, indirect light, consistent temperature, and for water cuttings, fresh water. If it's a soil cutting, check that you're not overwatering. Also, ensure the cutting was healthy to begin with and properly callused.
- My cutting is rotting! What happened? Rot is usually caused by too much moisture. If in water, ensure only the very bottom is submerged and change the water often. If in soil, you're probably overwatering. Always let the soil dry out completely between waterings. Also, a good callus before planting is, like, super important.
- Can I propagate a variegated snake plant from a leaf cutting? This is an interesting one! While you can propagate variegated snake plants (those with yellow or white edges) from leaf cuttings, the new plantlets often revert to being plain green. This is because the variegation is in the parent plant's stem cells, not always reliably carried through leaf propagation. If you want to maintain the variegation, division is, honestly, the best method.
- How do I know when to move
Detail Author:
- Name : Christine Quigley
- Username : glover.elmo
- Email : pollich.celine@mcglynn.info
- Birthdate : 1983-06-01
- Address : 69320 Dickens Ports Jaidenbury, TN 73718-2121
- Phone : 607-413-9471
- Company : Brekke, Tillman and Eichmann
- Job : Immigration Inspector OR Customs Inspector
- Bio : In est consequuntur suscipit non excepturi est deserunt. Non debitis cum sit. Omnis sunt soluta ut quas incidunt eos ea. Accusantium aut consectetur rerum voluptatem in velit.
Socials
tiktok:
- url : https://tiktok.com/@luciano.koss
- username : luciano.koss
- bio : Maiores blanditiis voluptatem impedit ab est quo.
- followers : 5906
- following : 1579
facebook:
- url : https://facebook.com/luciano_koss
- username : luciano_koss
- bio : Voluptatem et illo quos qui.
- followers : 6010
- following : 2564
linkedin:
- url : https://linkedin.com/in/kossl
- username : kossl
- bio : Vel sint eaque quia quaerat.
- followers : 6675
- following : 1985
